Category Archives: beans

Amazing Enchilada Pie

Gluten-free, Vegetarian Enchilada Pie

Since most enchilada sauce is made with flour to thicken it, I had mostly just given up on eating and making enchiladas. I thought the sauce was the most important part of the dish, right? Even canned sauce is suspect since I had a bad reaction once. But those days are over! I searched on the Internet to find out how to make my own enchilada sauce. Turns out, it’s not that hard. Using corn starch to thicken it makes it gluten free and adding the spices you want keeps it just as spicy as you like it. I read about 10 different recipes calling for all kinds of spices, flour, corn starch, etc. and decided to create my own…And after attempting to roll the tortillas, I gave up and decided it was easier to make this a layered pie instead. Still tasty and much easier, but if you feel like rolling, go for it.

I decided to fill it with veggie goodness since cheese enchiladas seems to be just a little overkill…but don’t get me wrong. I still love cheese as you can see from the photo. There’s plenty of cheese in there and if you’re rocking this vegan, just use your favorite soy/rice cheese in place of the cheese I’ve used. Still yummy!

Amazing Enchilada Pie
Sauce
1 28 oz. can diced tomatoes (I used Trader Joe’s)
1 6 oz. can of tomato paste (I used Trader Joe’s)
About a tsp of each of the following, then keep tasting and tweaking till it meets your tastes
  salt, pepper, garlic powder, dried epizote, dried parsley
(if you don’t have epizote, you can skip it. I just happen to have it as a gift from a friend)
2 tsp each cumin and chili powder
1 cup water
2 TBS corn starch

Enchiladas
1 doz. corn tortillas
1 sweet onion, chopped finely
2 cups frozen roasted corn (Trader Joe’s)
2 cans black beans
1 1/2 cups frozen spinach
1 tsp garlic powder
1 tsp cumin
1 tsp ground pepper
2 cups grated Mexican cheese
olive oil

1. Preheat oven to 375 and spray a glass pie dish. This recipe actually made three pies, so cut it in half if you don’t need that much. Remember you can freeze them.
2. In a large pot, combine diced tomatoes (don’t drain), tomato paste, 1/2 cup water and spices. Stir until mixed and let simmer while you make the enchilada filling.
3. To make the filling, use a large skillet and add the onion in some olive oil and cook until tender. Add a pinch of salt to the onion.
4. When the onion is soft, add the corn, black beans, spinach and spices. Mix and let it simmer for about 15 minutes to blend the flavors.
5. Use an immersion blender and blend the sauce until smooth. (you can use a blender if you don’t have an immersion blender, but be careful since this is hot)
6. Mix corn starch with 1/2 cup of water and mix until corn starch is dissolved. Add it slowly to the sauce while stirring
7. Now it’s time to layer the pies. On the bottom of the glass baking dish, spoon enough sauce to just cover the bottom. Layer with tortillas by ripping up the tortillas if needed to make one layer. Spoon the bean/corn mixture evenly over the tortillas (about a cup), then cover with a sprinkling of cheese.
8. Repeat with another layer of tortillas, veggie mixture and cheese.
9. Top off the pie with another layer of tortillas, then spoon about a cup of sauce to cover the top. Make sure no tortilla is left uncovered since it will get hard and burn in the oven. Cover this layer with cheese.
9. Repeat in the remaining baking dishes.
10. Bake for 30 minutes. Remove and let them sit for about 10 minutes before serving.

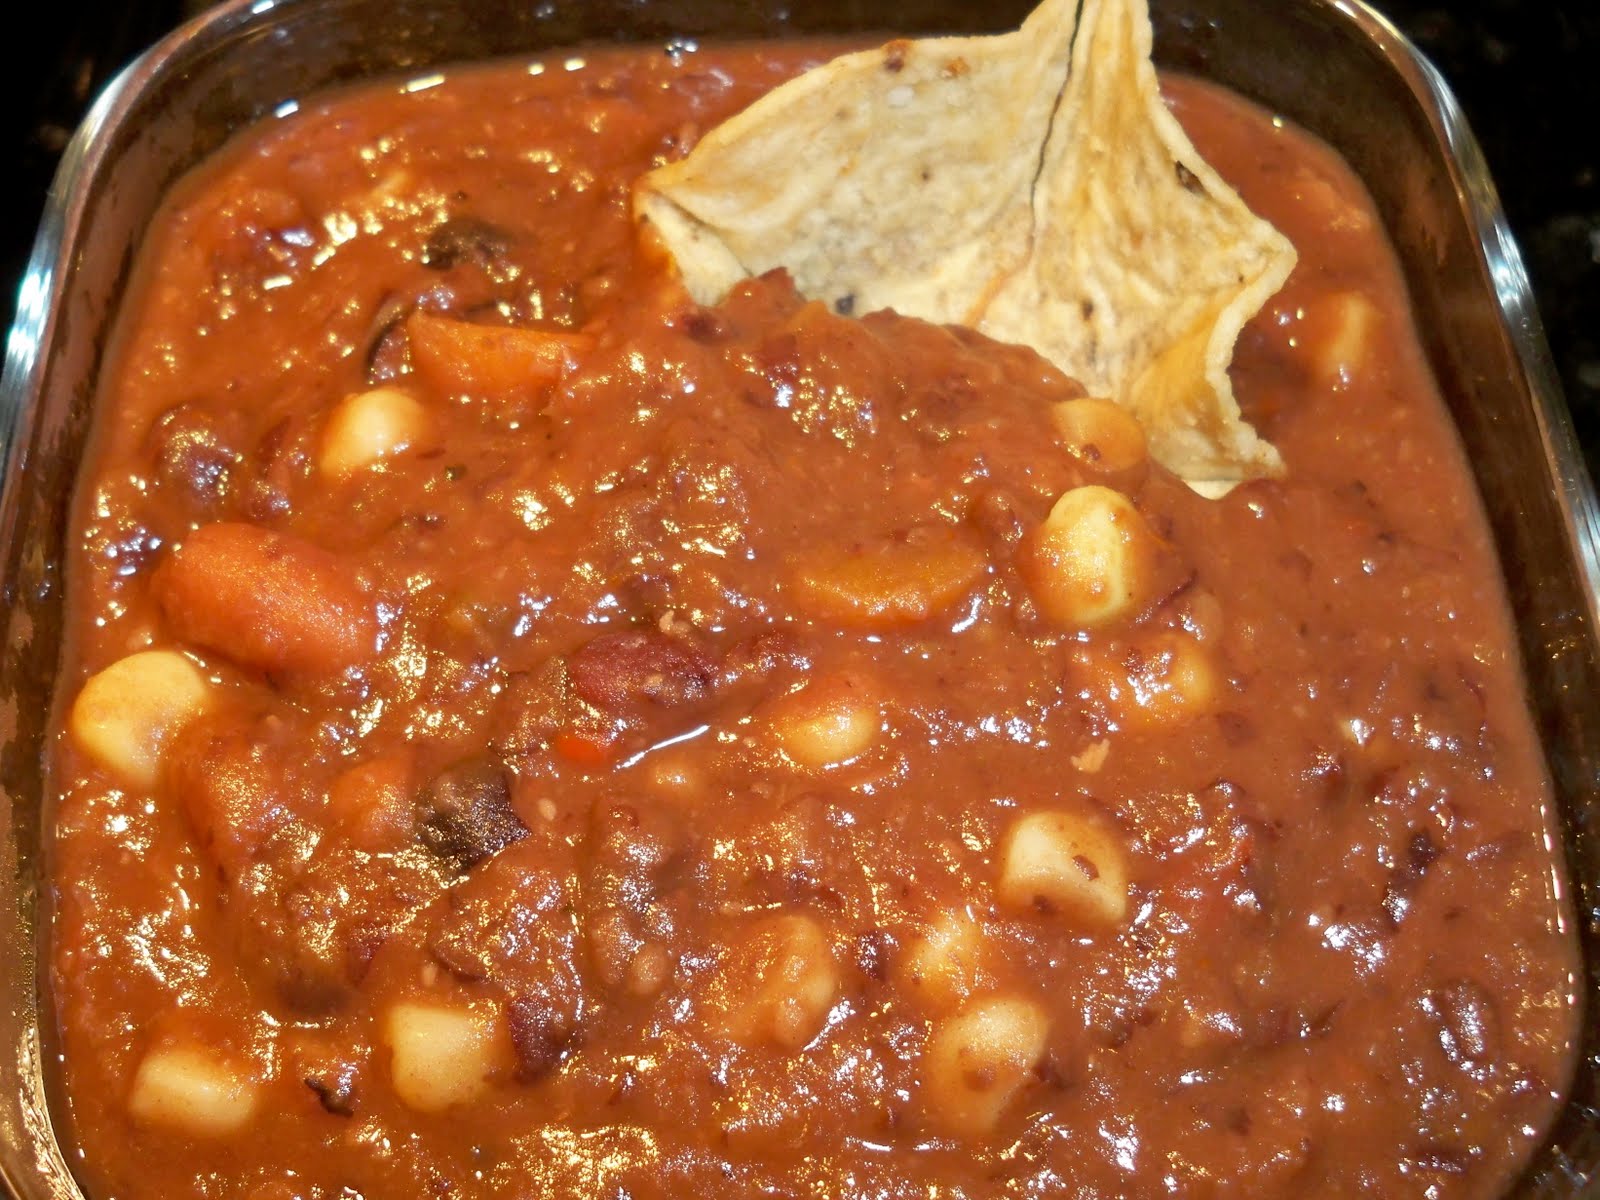
This is the cheesy goodness that came out of the oven! Yum!

This recipe made just enough sauce for the three baking dishes. Next time, I may double the sauce recipe to have a little extra. Other than that, these are the best I’ve ever made, or eaten. Even my husband said the sauce and enchiladas were better than any restaurant. High praise!

Enjoy!

Leave a comment

Filed under beans, corn, enchilada, gluten free, spinach, vegetarian

Greens and Beans


I found the most wonderful escarole at the farmers market today and couldn’t wait to cook. Tonight, I made something my mother used to make when I was young (minus the ham she threw in there). It’s a simple dish we loved when we were kids, and now I love it as an adult since it’s low fat, low calorie and jam-packed with vitamins and goodness. Even protein from the beans. My mom was a great cook (and still is) and I love making something I learned so long ago while putting my own twist on it. Give it a shot and add whatever you want. I think I’ll go with some sauteed onions next time, although it’s awesome just the way it is.

For those of you following the blog, I’ve done something similar with red chard, and you could use spinach or any other greens if you want. Experiment and have fun…

Greens and Beans
1 bunch of escarole, washed and chopped
1 can white beans, rinsed
1 can tomatoes
1 tsp tomato paste
garlic powder
salt/pepper
fresh parsley

1. Throw the escarole in a large saute pan with a little water and let it wilt slightly.
2. Add all other ingredients and let simmer for about 15 minutes.
3. Serve with Parmesan cheese (optional)

It’s that easy, and that good. It’s fresh and filling and a wonderful comfort food.
Enjoy!

2 Comments

Filed under beans, escarole, vegetarian

More Soup Please!


Since it’s been quite cool around here these days, it just seems like soup weather. Reading on Facebook that so many friends were pulling out their crockpots to make soup gave me the incentive to play around with an old favorite. I’ve used the usual bean recipe but tweaked it with what happened to be in the fridge. Take heed and use up what you have lying around and you’ll find all kinds of great combinations you wouldn’t have tried before. Leeks and black beans? Yup. Kale and pine nuts? Yup. Just give it a try. I will admit I’ve made some real stinkers in the past, but that’s the price you pay, Dear Chef, for experimenting. The majority of the time you come up with a winner.

Leek and Bean Soup
2 leeks, cleaned and sliced
3 carrots, sliced
1 red pepper (or 5-6 small, sweet red peppers)
3 cans black beans, drained
1 can pinto beans, drained
1 can stewed tomatoes
2 cups veggie broth
1 tsp cumin
1 tsp garlic powder
1/2 tsp cayenne pepper
1 cup frozen corn

1. Saute leeks, carrots and peppers until soft-about 10 minutes.
2. Pour the rest of the ingredients (except corn) into the crockpot and turn on high.
3. Pour veggies into crock pot, mix and cover.
4. Cook for 3 hours on high or 5 hours on medium.
5. Remove about 1.5 cups of the soup and set aside. Take an immersion blender and smooth out the rest of the soup in the pot.
6. Add retained soup and corn back to crockpot and stir. Wait about 5 minutes for corn to warm up.
7. At this point, add salt and taste. Adding salt while cooking beans can make them tough, so wait until the end to add it.
7. Serve with shredded cheese (optional) and tortilla chips. This soup comes out so thick, we use the tortilla chips and scoop it up like a dip. Hmmm, there’s an idea.

You may recognize this as the soup we usually add Taco Bell taco sauce into. Today, I decided to go without and add my own spices. It came out with a great texture and just enough bite without making it too spicy. Feel free to add tabasco or more hot sauce if you want. I prefer to make it mild to start with.

Enjoy!

Leave a comment

Filed under beans, gluten free, leeks, soup

Awesome Black Bean Soup


Throughout the ages, we’re all looking for that great, quick soup recipe. Well, here it is. This is the reason for buying a crockpot, just to make this soup. I must give credit to the original recipe-I found it on crockpot365.com. I did have to tweak it, you know that’s the way I roll. I love using a crockpot since the work is done for you. Follow the recipe and you can’t go wrong (unlike the mushroom/broccoli risotto fiasco just a week ago in the crockpot. I won’t even tell you how that turned out. Let’s just say we all make mistakes!)

Awesome Black Bean Soup
3 cans black beans, drained
1 can stewed tomatoes, do not drain
2 cups veggie broth
6-9 packets Taco Bell mild taco sauce (yes, I’m not kidding)
1 TBS cumin
1 cup chopped carrots
1/2 cup chopped celery
1 cup frozen corn
shredded cheese (optional)

1. Pour all ingredients except corn and cheese into crockpot. (I usually spray the inside just to try and make cleanup easier).
2. Cook on high for 4-5 hours, medium for 8-10 hours.
3. At the end of the cook time, take out two cups of soup (trying not to get too many tomatoes) and use an immersion blender to blend it till smooth.
4. Return the reserved soup and frozen corn.
5. Cook for about 5 minutes to warm corn.
6. Serve with shredded Mexican cheese if you want, or even tortilla chips.

My daughter loves to scoop the soup with tortilla chips. I prefer to just eat it with a slight pinch of cheese. Husband adds a boatload of tabasco. Whatever floats your boat, dear chef. And I tend to double the recipe if I’m bringing it to a potluck. It goes over very big and is one of the first things to be empty.

Enjoy!

1 Comment

Filed under beans, soup, tomatoes

Quinoa Salad


I have embarked on the fantastic Nanowrimo boat (which is writing a 50,000-word book in 30 days) and therefore try to use my extra time to write. I’m attempting to make dishes this month that are easy to prepare and that I can eat over and over.

Today, I found fresh corn and cut all the corn right off and added it to black beans and quinoa-one word-marvelous. The corn was crunchy and sweet and the bean gave it just enough texture. I added a little fresh thyme from my garden, which gave it a wonderful flavor. Just don’t overdo it, it’s pretty strong.

If you don’t have fresh corn, dear chef, you can use frozen-but never canned. Canned corn is just too mushy for this. You want the crunchy texture of the corn, and what’s better than fresh?

Quinoa scares some people because it’s so new and different and it’s been compared in many ways to cous cous in texture. But this is not a grain, it’s naturally gluten free and very high in protein, making it even better than cous cous and, I believe, much tastier. Give it a try, you’ll be thinking up new ways to cook it as soon as you eat it.

Quinoa Salad
2 cups quinoa
2 cups water
Corn from three fresh cobs, cut off and rinsed
1 can black beans, rinsed (if you have time to soak some, that’s even better)
2 Tbs olive oil
3 tsp salt
1 tsp pepper (to taste)
1/2 tsp fresh thyme
1/2 tsp fresh tarragon

1. Rinse quinoa in a fine mesh strainer. Quinoa has an outer coating to scare off the birds and makes it taste bitter. Just rinse it off for a few moments.

2. Add quinoa to water and bring to a boil. Add 1 tsp salt and let simmer for 15 minutes. Quinoa gets little swirlies in the middle when it’s about done.

3. In a large saute pan, saute corn with 1 tsp salt and 1 Tbs olive oil. Saute for just a moment until warm, then add the beans and stir. Add herbs and pepper and stir till the veggies are warm.

4. Add quinoa to the veggies and saute with the last Tbs of olive oil. Mix well and serve.

By the way, this makes a lot of salad, enough for a few days of lunches so be aware. If you don’t want as much, just cut the recipe in half and you’re good to go, but I guarantee you’ll wish you had made a big batch.

This is also great when it’s cold as a salad. I couldn’t wait until it cooled off before eating it and it was wonderful. Can’t wait for lunch tomorrow.

Enjoy!

Leave a comment

Filed under beans, quinoa, salad, vegetarian

Veggie Feast

I decided to use a few fresh, organic veggies and do it up right. I love the strong, earthy bite of kale and have never really cooked with it before. And my new-favorite veggie these days is chard, with it’s beautiful color and kick of flavor. I used to use escarole more often, but I like chard’s distinct flavor and texture. Either one would work in place of the other, in my opinion. Enough garlic and everything tastes great.

I’ve made two dishes today and put them in the fridge (after sneeking a bunch for myself). I’ll save them for dinner/lunches in the next few days. One dish is a variation on the last post I did using a red chard this time and white bean. The other is something of a variation on a dish I saw at Whole Foods that had steamed kale and soy sauce, sesame oil, etc., except theirs is not GF and therefore I can’t have it. So I just made my own version.

Both are simply delicious. Make enough to save and snack on later, I can’t stop picking at them when I open the fridge. Somebody stop me…

Red Chard with White Beans
1 bunch of red chard, cleaned and chopped
1.5 tsp olive oil
2 cloves garlic chopped
1 can white cannelini beans, rinsed
1/2 cup marinara sauce
salt/pepper

Simple dish…
1. Place chard in a hot saute pan with the oil over medium heat. Toss in the pan until it’s wilted
2. Add the rest of the ingredients. Mix, simmer 10 minutes and voila. Next!

The flavors are even better the next day since they have time to infuse. The stems are still crisp, just the way I like them. I think I’ll make some GF rolls to eat with them. Yum…


Steamed Kale with Golden Raisins
1 bunch kale, cleaned and chopped
1/4 C golden raisins
salt/pepper

sauce:
2 TBS GF tamari sauce
1 tsp sesame oil
1/2 tsp garlic powder
1 dash cayenne
1 tsp chopped parsely
1 tsp rice vinegar
1 tsp agave nectar

1. Steam kale leaves in a saute pan with a 2 TBS water on the bottom. Cover until wilted but still crisp (water should be about gone).
2. While kale is steaming, mix sauce ingredients in a small bowl. Taste and tweak it to your liking, add more soy, more sesame, etc. until you have it just right.
3. Pour sauce, salt, pepper and raisins into pan, toss and turn off heat and let it sit for a few moments for the flavors to marry.

I like to server this one cold. Let it cool in the fridge before serving. The bite of the kale with the sweetness of the raisins is so satisfying.

Feel free, dear chef, to experiment with adding almonds, different greens, different beans, etc. These are so flavorful they would make a great side dish, or stand alone on their own.

Enjoy!

Leave a comment

Filed under beans, gluten free, kale, raisins, Swiss Chard, vegetarian

Savory Bean and Spinach Soup


While taking advantage of some free time, I sat back and read a magazine. This happened to be the April issue of Fitness magazine. In the very back, I spotted a recipe that looked beautiful. Those magazine photos make food look so good, don’t they? Well, I spotted this, realized I had it all in my kitchen already (and more) and jumped up to make dinner. Success…we had it for dinner, breakfast for two days and even gave some to a friend for dinner. It sounds like a lot, but with brown rice and beans, it’s filling and wonderful with a salad on the side.

Even though the recipe didn’t have cabbage or yellow squash in it, I had those left in the fridge…so in they went. It was great since the cabbage gave it a little crunch and the squash gave the soup a pretty yellow. Try it and add whatever you have in the fridge. I’m sure you’ve got most of it in the kitchen already.

Savory Bean and Spinach Soup
1 medium onion, diced
2 garlic cloves, chopped
1.5 cups chopped cabbage
1 yellow squash, chopped
1 package (about 2.5 cups) Trader Joe’s frozen pre-cooked brown rice (or 1/2 cup uncooked rice)
1 15 oz. can crushed tomatoes
1 15 oz. can great northern beans, drained and rinsed (or any white bean really)
1 tsp dried basil
1 tsp dried parsley
salt and pepper
2 cups frozen spinach (or about 8 cups fresh spinach)
4 cups vegetable broth
Parmesan or Romano for garnish

This is all made in one pot, adding as you go.
1. Saute onion and garlic in large soup pot with 1-2 TBS of olive oil.
2. When onions are translucent, add cabbage, a pinch of salt and cook for another 5 minutes till cabbage is getting translucent.
3. Add chopped squash and saute another few minutes.
4. Add basil, parsley, a little more salt and pepper.
5. Add rice and mix well. If you’re using the frozen rice, it will reduce the heat so mix well and cover for a few minutes to bring the heat back up. If you’re using uncooked rice, just add it in and mix.
6. Add tomatoes, beans and spinach. Mix well and cover for a few moments to bring up the heat with frozen spinach and wilt fresh spinach.
7. Finally, add broth and enough water to cover by about 1 inch. If you’re using frozen or cooked rice, just simmer until everything is hot and blended–about 15 to 20 minutes. If you’re using uncooked rice, you’ll need to add more water and give it at least 40 minutes to an hour of simmering to cook the rice.

Serve with a garnish of shredded Romano or Parmesan cheese.
Enjoy!

Leave a comment

Filed under beans, cabbage, gluten free, rice, soup, squash

Hummus–simple and yummy!

I’ve been buying hummus from Trader Joe’s for years. If I’m really craving it and don’t want to make the drive, I buy it at Safeway. But the other day, I took a look at the ingredients and just about choked… Why is there high fructose corn syrup in hummus? What’s the purpose? Also, there were so many preservatives and extras I just didn’t want.

That made me think–what the heck, I can cook. How hard can hummus be? Just put chickpeas in a processor, right? Believe it or not, it really is just about that simple. There are more ingredients of course, but if you make it yourself, it’s all natural and you can add or reduce anything you want. My first try, I just made your average hummus with chickpeas, garlic, salt and tahini (ground sesame seed paste). It was good.

Today, I decided to be creative. I used 1/2 chickpeas and 1/2 white beans. Yum! I made two different kinds, since I was now a seasoned pro at making hummus. The first one was a roasted red pepper hummus, which just meant I took a roasted red pepper out of the jar and added it to the hummus. Easy. I suppose you can roast your own pepper over the stove, then sweat it for a few moments and peel off the skin. But I always have a jar of roasted peppers in the fridge just in case I’m in a hurry.

The second one was more simple, with just a hint of cayenne and garlic. Wow. I ate these for lunch with a ton of carrot sticks and it was great. I know that may sound like an anemic lunch to some, but the hummus is filling and the carrots are crunchy and good. It filled me up and I felt as if I were eating healthfully, which I was.

Basic Yummy Hummus

1 can chickpeas, drained
1 can white beans, drained
1/4 cup olive oil
salt
2 tsp chopped garlic
1 roasted red pepper
1/2 tsp cayenne

If you have a large processor, add all ingredients except for the red pepper and cayenne. Add the olive oil slowly, you may need a little more or less, depending on the consistency that you like. You can also taste and add more salt if you like at this point. Keep it pretty thick though, since adding the pepper will add more liquid.

Once everything is blended smoothly, take out half of the mixture and stir in the cayenne. This one is done.

With the half that is still in the processor, just add the roasted pepper and blend until it’s incorporated in the hummus.

Serve with fresh veggies, gf crackers (glutino crackers are quite good), gf bread or even on grilled veggies or in lettuce wraps with crisp veggies.

Next I’ll try some roasted eggplant for another of my favorites. The great thing about this is you can make it any way you want, or add anything you want.


My tiny processor. I think it’s just for little jobs, but I don’t have a big one. I think it may be time to splurge on the big one, especially since my blender just went out of business. But this is cute, isn’t it? And it gets the job done.

Try this, it doesn’t get any easier. Everything goes in the processor, blend and your done. Now if you’re like me and you only have this tiny processor, you have to do it in batches. And even that wasn’t too bad. I did it all in batches until I had all of it blended, then added the roasted pepper to half the mixture. It took longer to peel and cut the carrots than it did to make the hummus. But if you have a full-size processor, it’s even quicker.

Enjoy!

Leave a comment

Filed under beans, gluten free, hummus, vegetarian

Shepherd’s Pie with a Twist

Being a vegetarian, and gluten free, means I eat a lot of veggies and starches. I try not to eat potatoes and rice every day, but that’s difficult sometimes. They are pretty easy to cook, especially when the rice comes precooked and the potatoes just pop in the oven.

But today I decided to try something new. I’ve always loved shepherd’s pie, but I used to use a ground meat substitute made from wheat gluten, then green beans and mashed potatoes on top. Yummy…but no more. The meat is out, and the potatoes, although good every so often, are coming over much less often.

So tonight it was wonderfully spiced beans and onions on the bottom and mashed cauliflower on top. Yes, that’s right. I recently saw an episode of You Are What You Eat, a wonderful British show about eating right and losing weight. The host of the show uses no dairy, wheat or meat (only fish occasionally) to get people in shape. She had a recipe for vegetarian shepherd’s pie with mashed cauliflower on top, so I thought I’d make my own version.


This was so tasty, and so wonderful, I think I’m putting this on my weekly rounds. If you want, you can add a little cayenne to the beans, but I skipped that step so Daughter could eat it. She doesn’t like spicy food (although Daughter #2 does). I think it would be great with a little spice, although I loved it this way just the same. I couldn’t stop eating it. I made a large, round casserole dish and I can share some with a friend tomorrow and have enough for lunch. Next time, perhaps I’ll add some red peppers or green beans. The possibilities are endless.

Veggie Shepherd’s Pie with Cauliflower Mash

1 can kidney beans, drained
1 can white beans, drained
1 medium onion, chopped
1 head cauliflower, chopped
1 TBS butter
1 tsp turmeric
1/2 tsp cumin
1/2 tsp garlic powder
1 tsp parsley
salt/pepper to taste

1. Steam the cauliflower until soft. I use an electric veggie steamer, and it takes about 30 minutes to get it nice and soft.

2. While cauliflower cooks, saute onion in a little olive oil and salt until soft.

3. Add drained beans and spices. Cook for a few minutes to mingle flavors.

4. Heat oven to 375.

5. When cauliflower is done, mix in butter and about 2 tsp salt and mash with a fork.

6. Pour bean mixture into casserole dish (spray to keep it from sticking).

7. Pour cauliflower over beans and spread evenly to the edges.

8. Bake for 30 minutes, check and make sure cauliflower gets nicely browned.

Enjoy!

Leave a comment

Filed under beans, cauliflower, gluten free, shepherd's pie, vegetarian